How do I set up the subcontractor invoices and payments feature for Procore + QuickBooks?
Answer
If you have 'Admin' level permission on the company's ERP Integrations tool, you can complete the initial setup for the QuickBooks® Desktop Subcontractor Invoices feature so that your team can sync invoices from Procore to QuickBooks® Desktop.
Things to Consider
- Required User Permissions:
- To complete the initial setup, ‘Admin’ level permissions on the company’s ERP Integrations tool.
- To turn the feature ON and to designate the accounting approvers who will be authorized to sync invoices, you must be your company's Executive Sponsor.
- Requirements:
- This feature requires you to set up a Retainage Service Item as specified below, even if your company doesn't typically hold retainage on subcontractor invoices.
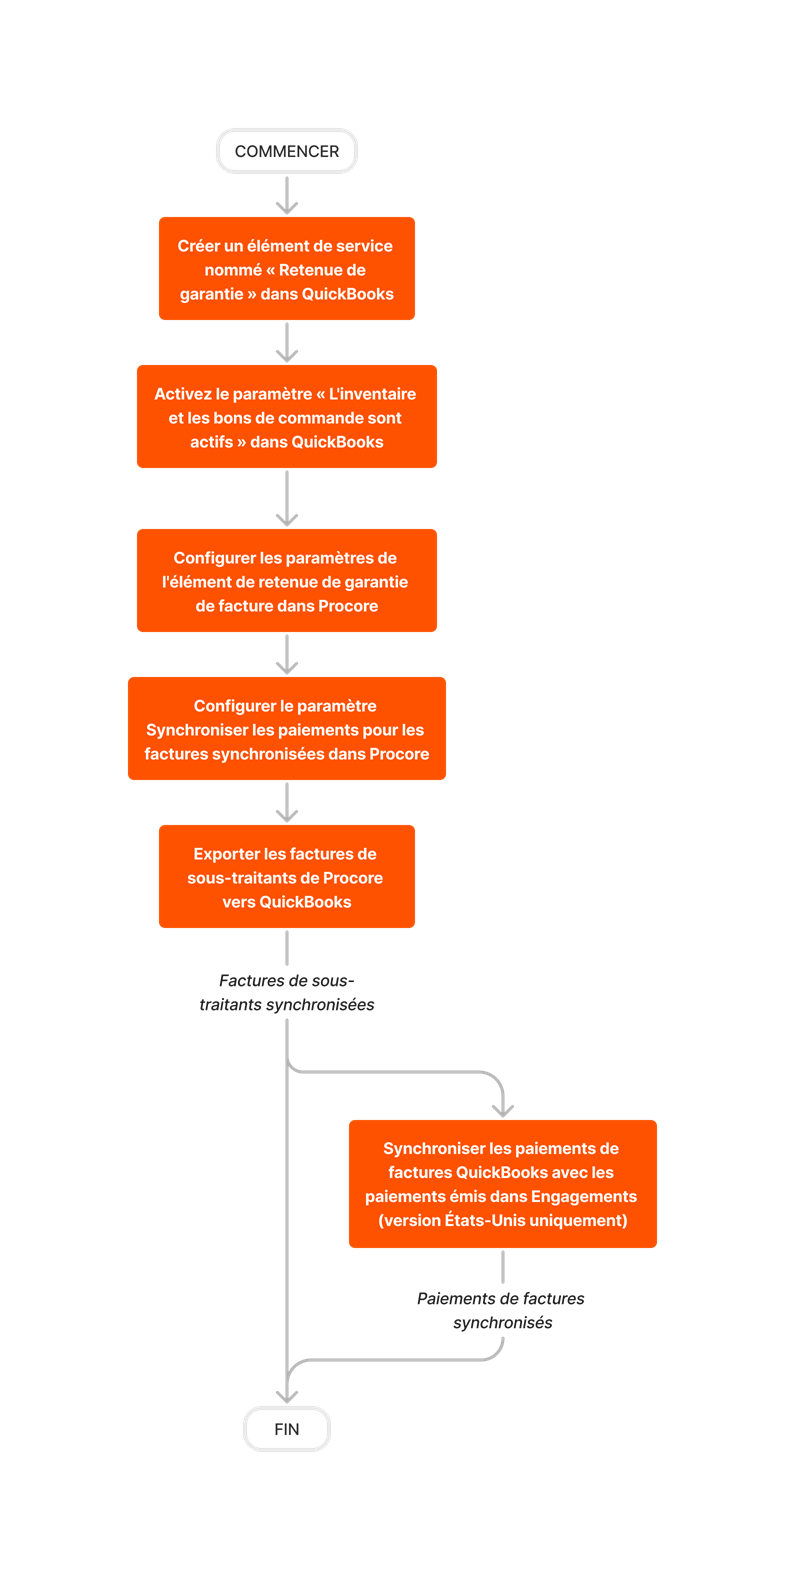
Workflow Diagram
Steps
- Set Up the Subcontractor Invoices Feature
- Configure the Sync Payments for Synced Invoices Setting
- Email Your List of Accounting Approvers to Procore
Set Up the Subcontractor Invoices Feature
Setting up the subcontractor invoices feature is a three (3) step process:
Step 1: Create a 'Retainage' Item in QuickBooks
- Launch QuickBooks.
- Create an Item and assign the Type as Service. Then name it: Retainage
Note: For step-by-step instructions, see Add, edit, and delete items in the QuickBooks Help system.
Step 2: Enable 'Inventory and Purchase Orders are Active' in QuickBooks
- Log in to the data file as an Admin user.
- Choose Edit > Preferences.
- Click Items & Inventory.
- Click Company Preferences.
- Place a checkmark in the Inventory and purchase orders are active box.
- Click OK to save the setting.
Step 3: Configure the Invoice Retainage Item Settings in Procore
- Navigate to the company's ERP Integrations tool.
- Click Configure Settings
 .
. - In the Invoice Retainage Item drop-down list, select the service line item where you want retainage to be recorded.
- Click Update.
Configure the Sync Payments for Synced Invoices Setting
- Navigate to the company's ERP Integrations tool.
- Click Configure Settings
 .
. - Click Sync Schedule.
- Under Sync Schedule, choose one of these options:
- Daily
- Every 4 Hours
- Never
- Every 2 Hours
- Hourly
- Click Update.
Email Your List of Accounting Approvers to Procore
- Ask your company’s Procore Executive Sponsor to contact Support with the following information:
- Email addresses for the accounting approvers who should be granted the additional permission to export subcontractor invoices to QuickBooks.
Note:- If you do not know your company’s Executive Sponsor, see the Executive Sponsor field under Account Information in the company's Admin tool.
- If there is no Executive Sponsor listed, contact your company’s Procore Administrator.
- Email addresses for the accounting approvers who should be granted the additional permission to export subcontractor invoices to QuickBooks.
- The ERP Support Team at Procore will then grant the correct permissions to your company's designated accounting approvers.
You can then begin using the feature.


