Enable Classifications on a Project
Objective
To enable classifications on a project for use with the Timesheets, T&M Tickets, Timecard, Timecard log in the Daily Log, and the My Time mobile app.
Background
In Procore, a classification is a way for a company to categorize its employees on a project. To provide your company with flexibility, you can create a customized classification list that suits your business's specific needs in the Company level Admin tool. After creating a classification, you can then use the steps below to enable them to use with Procore's Resource Tracking tools.
Examples
- You might want your classifications to reflect roles in the building trades, such as Bricklayer, Electrician, and so on.
- You might want your classifications to reflect a rank in a trade, such as Apprentice, Journeyman, and so on.
Things to Consider
- Required User Permissions:
- 'Admin' level permissions on the project's Admin tool.
- Additional Information:
- To learn which Procore tools interact with classifications, see Which Procore tools support 'Classifications'?
Prerequisites
- To access the Classifications tab in the Project Admin tool, your company must have a license for the Timesheets and T&M Tickets tools.
- You must create one or more classifications at the company level. See Add a Classification or Update the User Import Template.
Steps
- Navigate to the project's Admin tool.
- Under Project Settings, click Classifications.
- Choose from these options:
- To set up classifications on your project for the first time
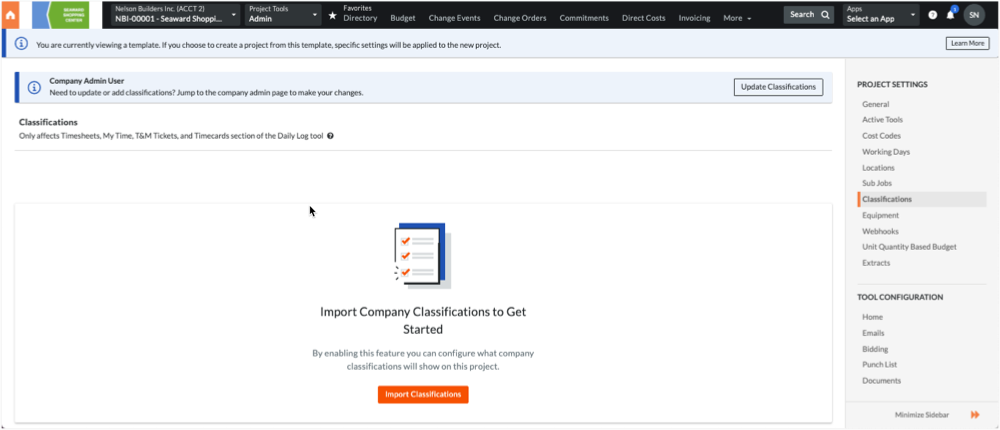
Click the Import Classifications button. This imports the classifications from the Company level Admin tool into your project. From this point on, any changes to the classifications at the company level are automatically updated in your project and you'll need to manually disable any new classifications that you don't want in this project. To jump to the Company level Admin tool to make changes, click Update Classifications. Then see Add a Classification.

- To disable all classifications
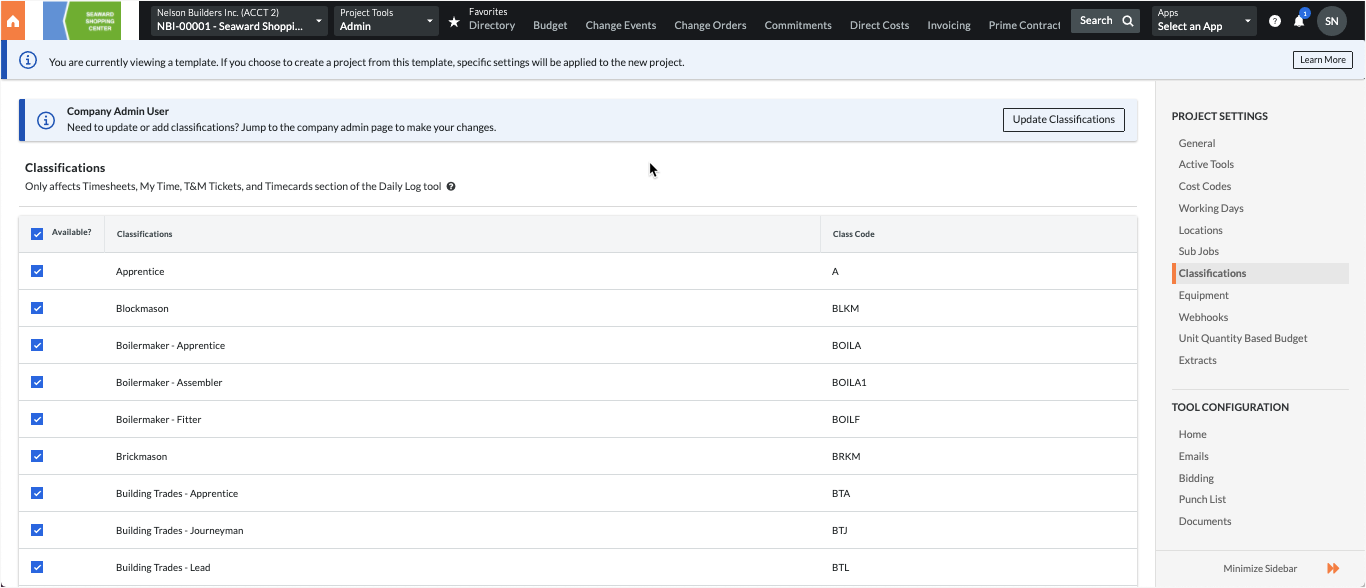
By default, all of your company's classifications are turned ON so you can remove the mark from the Available? checkbox in the table's header row to select the ones you want one-by-one. - To enable specific classifications
Mark the individual checkboxes as appropriate for your project.

- To set up classifications on your project for the first time
Procore automatically saves your settings.