What are the DocuSign® fields and can I customize them?
Answer
The Procore + DocuSign® integration is designed to work with specific Procore tools. It helps you collect signatures on specific Procore items by sending an electronic DocuSign® envelope to your recipients.
To learn about the fields that are available in a DocuSign® envelope, see:
DocuSign® Recipient & Signature Fields
When using the Procore + DocuSign® integration to send Procore items to DocuSign®, some items will automatically include a name and email in DocuSign's recipient blocks in the 'Add Recipients to an Envelope' section. In addition, some items automatically will also place the required signature fields for those recipients into the PDF copy of the item being sent in the DocuSign® envelope. Other Procore items may require you to add the fields to the DocuSign® envelope on your own.
Note
Always ensure that the data exists in Procore before sending it to DocuSign®. If you leave a Procore field blank, the corresponding data field in DocuSign® is also blank.The table below details the recipient and signature information in DocuSign® and its corresponding source for the data in Procore.
| Procore Tool Name | Procore items that can be sent to DocuSign® to collect signatures | DocuSign® Recipient Block | DocuSign® Signature Field Automatically Added to PDF? | Procore Field/Data Source |
|---|---|---|---|---|
|
Client Contracts1, Funding 2, and Prime Contracts |
Client Contract1, Funding 2, or Prime Contract Potential Change Orders Change Order Requests Change Orders |
Architect |
Yes |
The Name and Email fields in the recipient block are populated with the first name, last name, and email address in Procore's Project Directory (only if added) for the person named in the 'Architect/Engineer' field on the item. |
|
General Contractor |
Yes |
The Name and Email fields in the recipient block are populated with the first name, last name, and email address in Procore's Project Directory (only if added) for the person named as the 'Contract Signer' for the company specified in the 'Contractor' field on the item. |
||
|
Owner |
Yes |
The Name and Email fields in the recipient block are populated with the first name, last name, and email address in Procore's Project Directory (only if added) for the person named in the 'GC/Client'1 or 'Owner/Client' field on the item. |
||
|
|
Commitment Contracts
|
General Contractor |
Yes |
The Name and Email fields in the recipient block are populated with the first name, last name, and email address in Procore's Project Directory (only if added) for the user who sends the commitment to DocuSign® for signature. |
|
Contractor |
Yes |
The Name and Email fields in the recipient block are populated with the first name, last name, and email address in Procore's Project Directory (only if added) for the person named as the 'Contract Signer' for the company specified in the 'Contract Company' field on the commitment. |
||
|
Correspondence Item |
N/A |
No |
In the Recipient block, you must manually enter the Name and Email address of your recipient(s) in DocuSign® . |
|
|
Documents You can only send Portable Document Format (PDF) files to DocuSign®. |
N/A |
No |
In the Recipient block, you must manually enter the Name and Email address of your recipient(s) in DocuSign® . |
|
|
GC/Client Invoices1, Funding Invoices2, or Owner Invoices
|
Contractor |
Yes |
The Name and Email fields in the recipient block are populated with the first name, last name, and email address in Procore's Project Directory (only if added) for the person named as the 'Contract Signer' for the company specified in the 'Contractor' field on the contract. |
|
|
|
Architect |
Yes |
The Name and Email fields in the recipient block are populated with the first name, last name, and email address in Procore's Project Directory (only if added) for the person named as the 'Contract Signer' for the company specified in the 'Architect'/Engineer' field on the contract. |
|
|
Subcontractor Invoices or Contractor Invoices2 |
Contractor |
Yes |
The Name and Email fields in the recipient block are populated with the first name, last name, and email address in Procore's Project Directory (only if added) for the person named as the 'Contract Signer' for the company specified in the 'Contract Company' field on the commitment contract. |
|
|
|
Subcontractor |
Yes |
The Name and Email fields in the recipient block are populated with the first name, last name, and email address in Procore's Project Directory (only if added) for the person named as the 'Contract Signer' for the company specified in the 'Contract Company' field on the commitment contract. |
1 The Client Contracts and Progress Billings tools are available to Procore customers in the United States who have implemented the Procore for Specialty Contractors point-of-view dictionary. To learn more, see What tool names and terms are different in Procore for general contractors, owners, and specialty contractors?
2 The Funding tool is available to Procore customers in the United States who have implemented the Procore for Owners point-of-view dictionary. To learn more, see What tool names and terms are different in Procore for general contractors, owners, and specialty contractors?
Creating Custom DocuSign® Fields
When sending an item (contract, change order, etc.) from Procore to DocuSign®, a DocuSign® field must be placed in the location where the signature, initial, etc. is shown on the PDF. This DocuSign® field directs the signer where to sign, initial, etc. on the PDF.
It is recommended that you create a DocuSign® template for each item (contract, change order, etc.) to place these fields. Each time a new item is sent from Procore to DocuSign®, the DocuSign® template can be applied to the DocuSign® envelope so these fields do not need to be manually placed for each envelope.
Due to the varying lengths of items, field locations on the PDF may vary from contract to contract or from change order to change order. DocuSign® has an AutoPlace feature that utilizes a user-defined text string to place the fields in the appropriate location on the PDF even if the location on the DocuSign® envelope varies from the DocuSign® template.
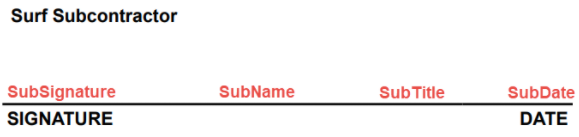
Procore Custom Solutions can add hidden AutoPlace text to an item's custom PDF to use for their AutoPlace feature. For example, if the subcontractor needs to enter their signature, name, title, and date in a certain location on a contract, Procore Custom Solutions can add the following hidden AutoPlace text (shown below in red) to the contract's custom PDF:
To use this process, follow these steps:
- Contact Procore Custom Solutions to request this hidden text be added to your form; a sample copy of the item that clearly identifies/highlights all areas that are to be filled out via DocuSign® will be required.
- Once Procore Custom Solutions has finalized your custom PDF, you will be given a list of the fields and the corresponding AutoPlace Text Strings (e.g. the "Subcontractor Signature" field uses the AutoPlace Text String of "SubSignature".
- Within DocuSign®, Create a Template for each item type (for example, a subcontract, potential change order, or change order):
- In Procore, export and save a sample custom PDF from an item using your custom form.
- In the first page of the DocuSign® template complete the following:
- Upload the sample custom PDF with the AutoPlace Text.
- Add the default Recipients, Message, etc.
- Click Next.
- In the second page of the DocuSign® template complete the following:
- Add Fields. After adding each field, use the AutoPlace feature to enter the corresponding AutoPlace Text provided to you from Procore Custom Solutions.
- When finished, click Save and Close.
- When sending an item from Procore to DocuSign®, Apply the Template.
- If your template does not appear, select the three dots, click Apply Template, and Browse to check the appropriate template.
- If your DocuSign® template Recipients are different than the Procore default recipients (see Answer section above), delete the Procore defaults prior to applying the template.
- Continue through the DocuSign® process to send the envelope.
Video