Set up Configurable Views for the Change Events Line Items View
Objective
To create and manage configurable views for the Change Events tool in Procore.
Background
The default views in the Change Events tool list view are 'Classic Detail', 'Classic Summary', 'Complete View', 'Owner's View' and 'Scope View'. Each view consists of a different arrangement and grouping of columns designed to present the data in the tool in a specific way. A configurable view is created and configured by Procore users when the desired column arrangement for the Change Events tool is not met by the existing default views. Creating configurable views allows users to customize the list view of the Change Events tool with the columns of their choice and save the view so it can be standardized across Procore projects.
Things to Consider
- Required User Permissions:
- 'Admin' level permissions on the Company level Admin tool.
- Additional Information:
- Newly created views are automatically applied to all projects.
- Newly created views are set to 'Hidden' until they are published. See Change the Status of a Configurable Change Events View.
- Custom Fields are NOT supported by configurable views.
Steps
Create a New View
- Navigate to the Company level Admin tool.
- Under 'Tool Settings', click Change Management.
- Click the Configurable Views tab.

- Click Create View.
Note: To edit an existing view, click the title of the view in on the Configurable Views page. - Enter a name and description for the view.
- Optional: Select a project from your company to preview the new view with up to 25 rows of data.
- Optional: Choose an existing view to use as a template for creating the new view. The new view will automatically be populated with the columns from the selected existing view.
- Click Configure View to begin configuring the new view.
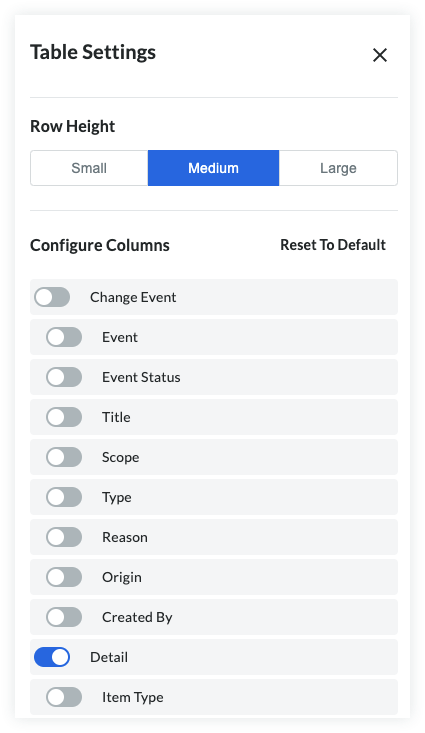
- Click the configuration icon
 to view the list of available columns to add to the view.
 - Toggle the switches on
 to include a column in the view.
Filter and Sort the Line Items View
Filtering
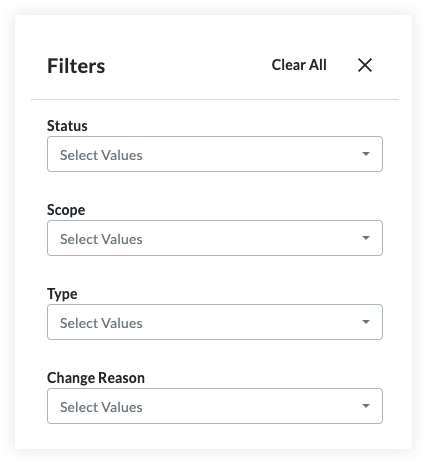
Click the Filters at the top of the change events table.
Select from the following filters:
- Status
- Scope
- Type
- Change Reason

Sorting
Click the title of a column to change its sorting behavior.
Example: Change the sorting order of the 'Status' column so Open Change events are listed first.
Grouping Columns
Column grouping allows you to better organize the Change Events line items table, especially when it comes to evaluating financial risk in your project. Specify which columns you would like to group and items within that group will roll-up underneath.
To group columns, click the Select Group selector at the top of the change events table and select the columns you want to group together.
If more than one grouping is selected, they can be rearranged within the 'Group By' Selector by clicking and dragging them into the preferred order. A grouping can be deleted by clicking the 'x' on the right side of the group.
Groupings can be reset by clicking Reset at the bottom of the selector.
Change the Status of a Configurable Change Events View
The status of individual configurable views can be toggled between Published and Hidden. Published views are available for use on their assigned projects and hidden views are not available for use. The hidden status is useful for when a configurable view is in creation but not ready to be implemented.
- Navigate to the Company level Admin tool.
- Under 'Tool Settings', click Change Management.
- Click the Configurable Views tab.
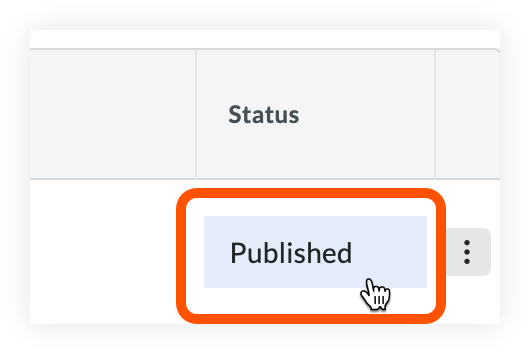
- Click the Status column in the row of the view being changed.

Duplicate or Delete a View
Configurable views can be duplicated to make building a new view easier. Duplicating a view creates a new view that is an exact copy of the existing view. Deleting a view removes the view permanently.
Note: Deleted views are NOT recoverable. Procore's default views cannot be deleted.
- Navigate to the Company level Admin tool.
- Under 'Tool Settings', click Change Management.
- Click the Configurable Views tab.
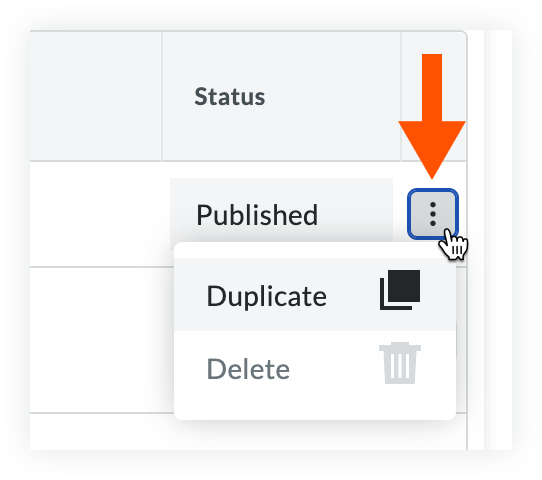
- Click the ellipsis icon in the row of the view being changed.

- Click Duplicate or Delete.


