Import Procore Time Entries into QuickBooks® Desktop
Objective
To import your Procore time entries into QuickBooks® Desktop.
Background
If your company processes its payroll using QuickBooks® Desktop, you can transfer the time entries from Procore's Company level Timesheets tool using a simple file export process. However, before you can start that data transfer, you must complete some set up steps:
- Export a preformatted Intuit Interchange Format (IIF) file from the QuickBooks® Desktop system where you intend to transfer your Procore data.
- Configure the Timesheets tool's payroll settings for QuickBooks® Desktop.
- Import the IIF file from QuickBooks® Desktop into Procore's Company level Timesheets tool.
Things to Consider
- Required User Permissions:
- Administrator permissions to QuickBooks® Desktop
- Supported Versions:
- QuickBooks® Desktop 2021 or earlier
- QuickBooks® Desktop 2022 with QuickBooks® Time
- QuickBooks® Desktop 2022 or after
- Additional Information:
- The same steps are used if you are using QuickBooks® Desktop (2021 or earlier) or QuickBooks® Desktop (2022) with QuickBooks® Time. However, if you are using QuickBooks® Desktop (2022) without QuickBooks® Time, you will follow different steps.
Prerequisites
- Review the process at Transfer Procore Time Entries to QuickBooks® Desktop.
- Complete the steps in Export a Timer List as an IIF file from QuickBooks® Desktop.
- Follow the steps in Configure the Company Timesheets Payroll Settings.
- Complete the steps in Export Time Entries from Procore to Import into QuickBooks® Desktop.
Steps
QuickBooks® Desktop (2022 or after)
- Log in to QuickBooks® Desktop as the Admin in Single User mode.
- Click File.
- Click Utilities.
- Click Import.
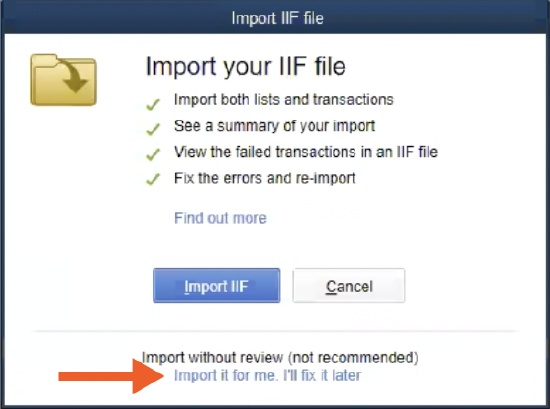
- Click IIF Files.
- Click Import it for me. I'll fix it later.

- Select your IIF file.
- Click Open.
- Verify the data is correct in QuickBooks® Desktop.
QuickBooks® Desktop with QuickBooks® Time (2021 or earlier)
- Log in to QuickBooks® Desktop Desktop as the Admin in Single User mode.
- Click File.
- Click Utilities.
- Click Import.
- Click Timer Activities.
- In the 'Import Activities from Timer' window, click OK.
- Select your IIF file.
Note: If you get the ‘warning’ message “This import file was created by an old version of the QuickBooks Pro Timer”, click OK to continue with the import process. - Click Open.
- Verify the data is correct in QuickBooks® Desktop.
Note: To see more information on an item, select an item and click View Report.

