Set Up your Payroll Export for use with Sage 300 CRE®
Objective
To set up your payroll export for use with Sage 300 CRE® software.
Note
This is separate functionality from the Procore + Sage 300 CRE® Connector.Background
You can export data from the Company level Timesheets tool in Procore and import it directly into Payroll in Sage 300 CRE®. This allows self-performing contractors to spend less time formatting data, decreases duplicate data entry between time collection and payroll and ensures a more accurate data flow.
Things to Consider
- Required User Permissions:
- 'Admin' level permissions on the company's Timesheets tool.
- Additional Information:
- The following fields will need to match exactly between Procore and Sage 300 CRE®:
- Employee & Employee ID
- Classification (Certified or Union Class)
- Pay ID & Time Type
- Job & Project
- JC extra & Sub Job
- JC Cost Code & Cost Code
- For companies using the ERP Integrations tool:
- The Project, Sub Job, and Cost Code fields sync automatically
- The following fields will need to match exactly between Procore and Sage 300 CRE®:
Prerequisites
- You must have a licensed for the Company level Timesheets tool.
Steps
Set Up a Time Entry View in Sage 300 CRE®
- Log in to Sage 300 CRE®.
- Select Applications.
- Select Payroll from the list.
- Select Tools.
- Select Customize Time Entry.
- Create a new time entry view.
Note: You must add a name and description for the time entry view, such as "Procore Time Import," before you can select the columns in the next step. - Double-click on the time entry column items in the same order that appears on the company's Timesheets tool in Procore.
Important
It is important to be aware of the following:
- To successfully perform the import, the time entry view for Sage 300 CRE® must be configured to exactly match the format in Procore's Timesheets tool. In addition, be aware that some Sage 300 CRE® columns have different names in Procore. In the table below, the asterisk (*) indicates a required field.
Column Name in Sage 300 CRE Equivalent Column Name in Procore Date Date Employee * Employee ID * Job Project JC Extra Sub Job JC Cost Code Cost Code Certified/Union class Classification Pay ID * Time Type * Units * Total Time * - To see cost type in Sage 300 CRE®, ensure that 'Pay ID' is associated with the correct JC Category (cost type) in Sage 300 CRE®. When imported, data in Procore's 'Time Type' is applied to the 'Pay ID' in Sage 300 CRE®. Time entries then populate the cost type that is assigned to the 'Pay ID'.
- If you include Union Class column, you must also include these columns to the time entry view:
- Union ID
- Union local
- Union class
- To successfully import the Union columns into Sage 300 CRE®, the default Union, Union local, and Union class items must be assigned to each employee in the Employee Setup in Sage 300 CRE®.
- Click Close.
Configure the Timesheets Tool in Procore
- Navigate to the company's Timesheets tool.
- Click Configure Settings
 .
. - In the Settings page, click the Configurations tab. This tab is active by default.
- Scroll down to the Payroll Settings section.
- In the Payroll Software drop-down list, select Sage 300 CRE®.
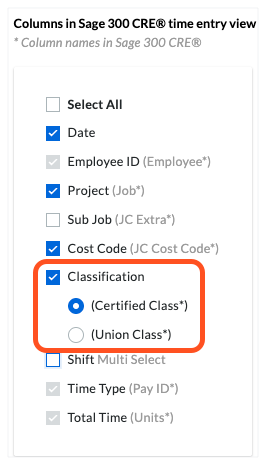
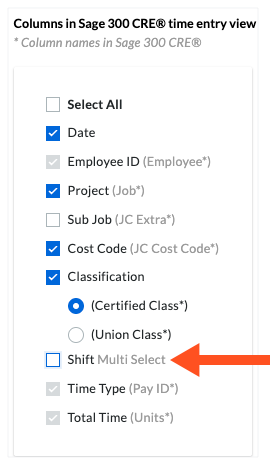
- In the Columns in Sage 300 CRE® time entry view list, place a checkmark next to the columns to include in the Sage 300 CRE® time entry view.
Notes
- If you place a checkmark in the 'Classification' column, you must choose the Certified Class or Union Class option button.
- If your team has created any custom fields for use with Procore's Timesheets and My Time Tools:
- To include those fields in the export by marking the corresponding check box(es) as shown below.
- To exclude those fields from the export, clear the checkmarks from the corresponding box as shown below. .
- If you place a checkmark in the 'Classification' column, you must choose the Certified Class or Union Class option button.
- Click Update.
See Also
If you would like to learn more about Procore's timesheet management software and how it can help your business, please visit our construction timesheet software product page  .
.