Sign a Document with DocuSign® in the Project Level Documents Tool
Objective
To complete the electronic signature process for a document stored in a project's Documents tool using the Procore + DocuSign® integration.
Background
If you have a DocuSign© account, you can send a document stored in the Project level Documents tool to DocuSign© to collect signatures on it. This lets you request signatures from any individual with an email address. That person can then receive, review, and return their signatures online--at any time from any Internet-enabled device.
Things to Consider
- Required User Permissions:
- 'Admin' level permissions on the project's Documents tool.
- Additional Information:
- Once you log into your DocuSign® account from Procore, you will NOT need to sign in again until the login token expires. Once expired, the 'Re-Authentication Required' banner appears in Procore. To learn more, see What do the different DocuSign® banners in Procore mean?
- Only PDFs can be signed with DocuSign.
Steps
- Navigate to the project's Documents tool.
- Locate the PDF document that you want to work with.
Note
The Procore + DocuSign® only supports signature collection for Portable Document Format (PDF) files. - Choose one of these options:
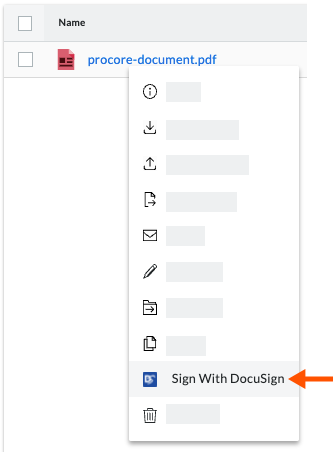
- Right-click the PDF document and choose Sign with DocuSign.

OR - Mark the check box that corresponds with the document. Then, click the vertical ellipsis
 icon and choose Sign with DocuSign.

This launches DocuSign©.
- Right-click the PDF document and choose Sign with DocuSign.
Log in to DocuSign®
Prepare the DocuSign® Envelope
Once you are logged into the DocuSign®, the 'Upload a Document and Add Envelope Recipient' page appears. Complete these steps:
- Add Documents to the Envelope
- Add Recipients to the Envelope
- Add a Message to All Recipients
- Preview the Signature Fields & Send the Envelope
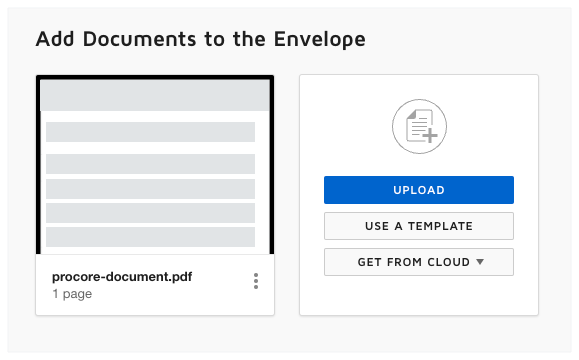
Add Documents to the Envelope
The following Procore information automatically populates the DocuSign® envelope:
- A PDF copy of the selected document is automatically added to the 'Add Documents to Envelope' section.
You have the option to add other documents as follows:
- Optional: Upload documents by doing one of the following:

Note
The available options in the 'Add Documents to the Envelope' section are developed and maintained by DocuSign®. To learn how to use DocuSign®, Procore recommends reviewing the content on support.docusign.com.- Upload
- Use a Template
- Get from Cloud
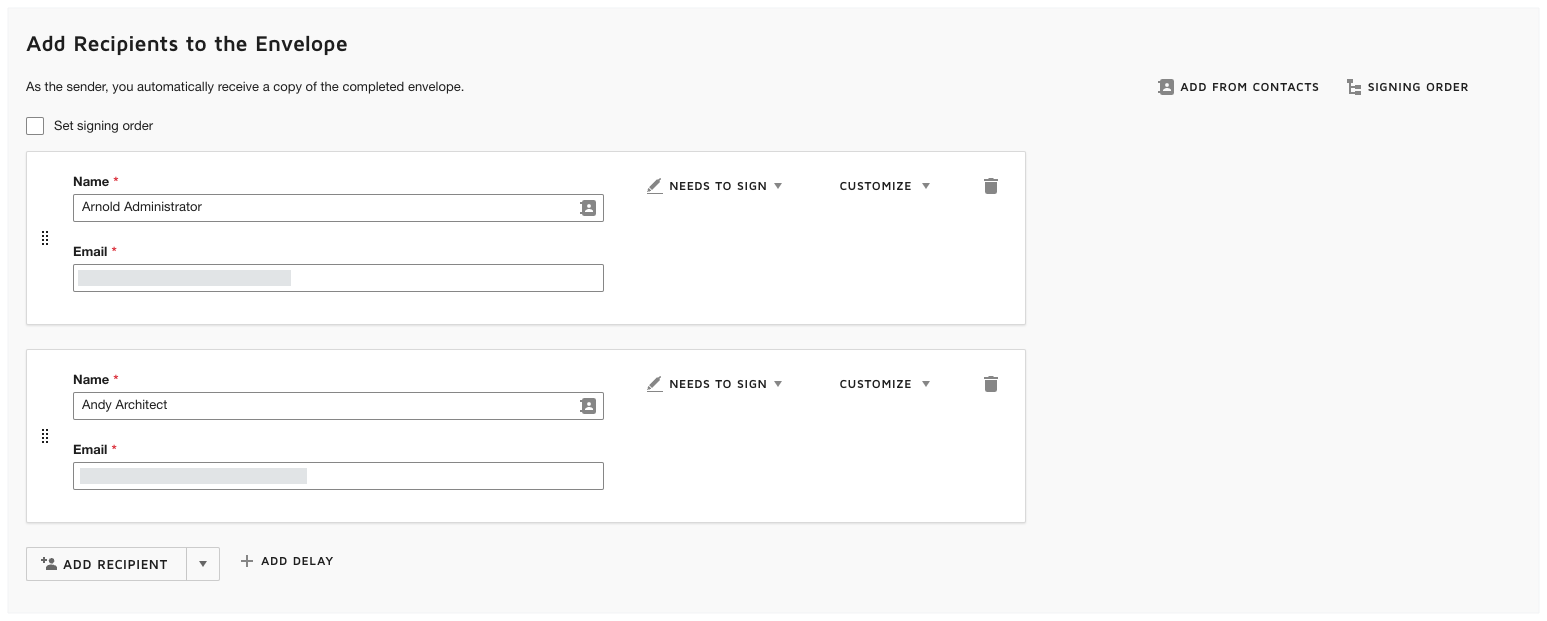
Add Recipients to the Envelope
To add recipients to the envelope:
- Under 'Add Recipients to the Envelope', enter a Name and Email address in the recipient block.
- Optional: To add more recipients, click the Add Recipient button and then enter a Name and Email address.
- Optional: Continue to add recipients as needed.

Add a Message to all Recipients
Place the Signature Fields & Send the Envelope
Next, place the PDF's signature fields. Each signature field corresponds to the authorized signature holder as designated in the correspondence. These fields also correspond to the recipients on the DocuSign® envelope.
- Under 'Standard Fields', drag-and-drop the 'Signature' field into a position on the PDF as desired.
Note
The options in the 'Standard Fields' area are developed and maintained by DocuSign®. To learn how to use DocuSign®, Procore recommends reviewing the content on support.docusign.com. - Optional: To preview the envelope as a recipient, click Preview. The click the close (x) icon in the top right corner to close the preview.
- When you are ready send the envelope out for signature, click Send.
DocuSign® sends the envelope to the specified recipients. Recipients can then continue with the Next Step.
Next Step
See Also

