Add a New Payment to the Payments Issued Tab of a Commitment
Objective
To manually record any payments your company issues for a commitment as an invoice administrator.
Background
To manually record any payments issued to the downstream collaborator on a commitment, use the 'Payments Issued' tab on the commitment.
Things to Consider
Prerequisites
Steps
- Navigate to the project's Invoicing tool.
- Click the Subcontractor tab.
- Locate the contract or invoice for the new payment record.
- Choose from these options to open the commitment.
- Contract. Click the Contract link to open the commitment.
- Invoice #. Click the Invoice # link and then click the Contract # breadcrumb link.
- In the commitment, click the Payments Issued tab.
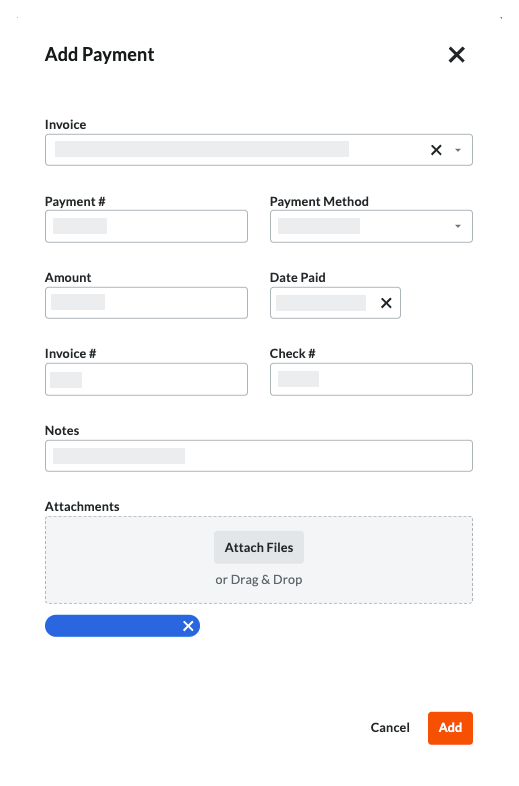
- Click Add Payment.

- In the Add Payment prompt, enter:
- Invoice. Select an existing invoice from the drop-down that the issued payment is attached to.
- Payment #. Enter the related payment number for the issued payment.
- Payment Method. Select a payment method from the drop-down list: Check, Credit Card, and Electronic.
- Amount. Enter the amount of the payment.
- Date. Enter the issue date for the payment
- Invoice #. Enter the related invoice number for the payment issued.
- Check #. Enter the related check number for the payment issued.
- Notes. Enter any additional notes regarding the issued payment for record purposes.
- Attachments. Attach any relevant files or documents.

- Click Add.


 When your company applies the 'Owners English' or 'Specialty Contractors English' point-of-view dictionary, you'll see different tool names and term changes in the user interface. Learn