Configure Advanced Settings: Correspondence
Objective
To configure advanced settings for the Correspondence tool.
Background
You can use the advanced settings in the project's Correspondence tool to configure settings and can view the Permissions Table for each correspondence type on the project.
Things to Consider
- Required User Permissions:
- To configure settings on the Tab Settings page:
- 'Admin' level permissions on the correspondence type to be configured.
- To configure settings on the User Permissions page:
- 'Admin' level permissions on the correspondence type to be configured.
AND - 'Admin' level permissions on the Project level Directory tool.
- 'Admin' level permissions on the correspondence type to be configured.
- To configure settings on the Tab Settings page:
Steps
Tab Settings
- Navigate to the project's Correspondence tool.
- Click the Configure Settings
 icon and select the correspondence type you want to configure settings for.
 - Click Tab Settings in the sidebar.
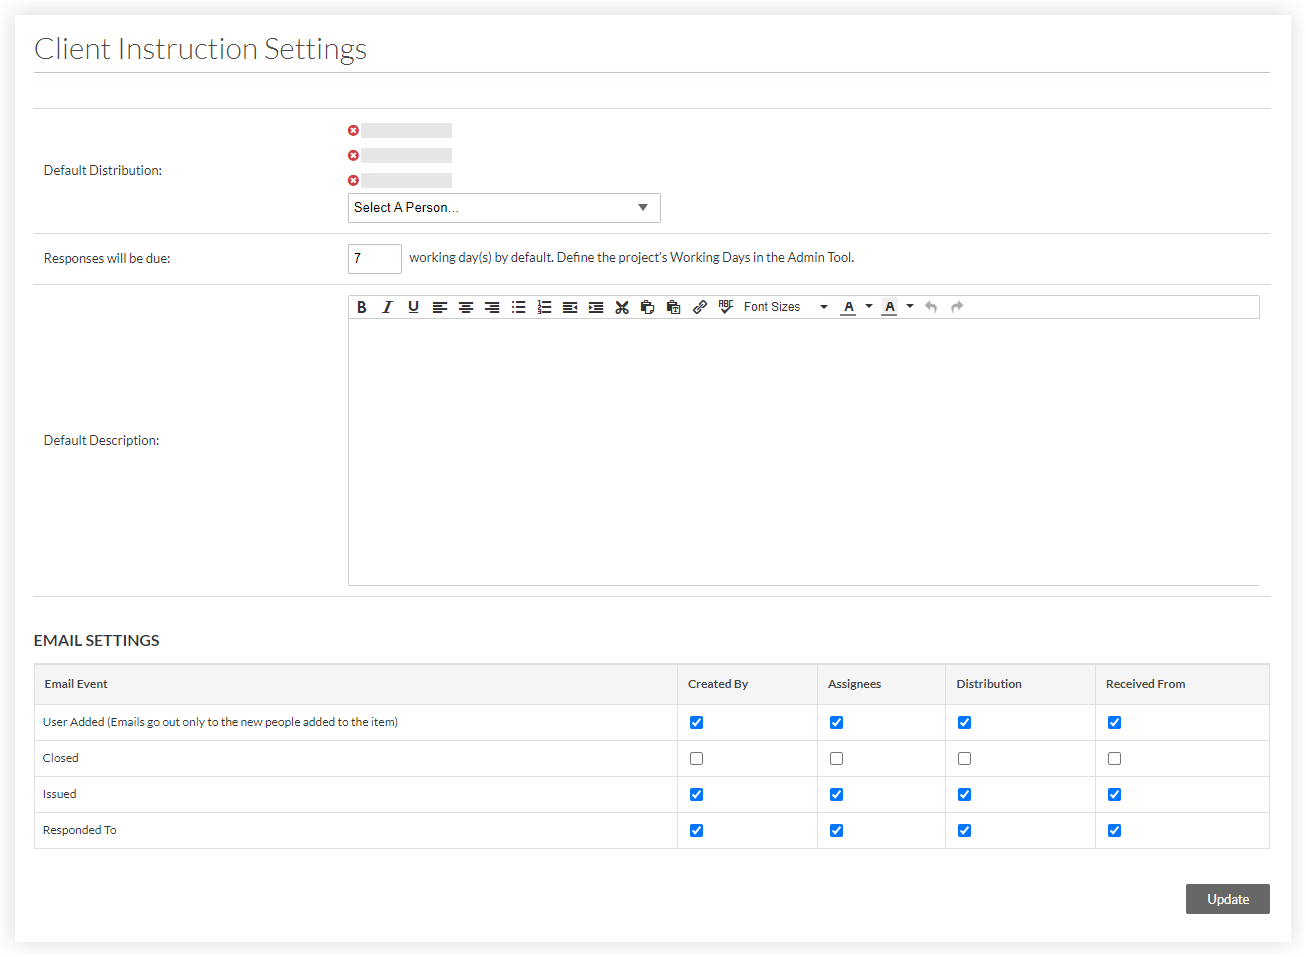
- Complete the following as necessary for your project:
Note: Users who create or edit a correspondence item using this correspondence type can change the Distribution, Due Date, and Description fields for individual items.- Default Distribution: Select one or more users or distribution groups from the drop-down menu. Click the
 icon next to a user's name if you want to remove them from this list.
Note: Users must have 'Read Only' level permissions or higher on the correspondence type to be added to this list. See Grant Granular Permissions in a Project Permissions Template. - Responses will be due: Enter a number for the default working days after which a response will be due.
- Default Description: Enter a default description to add to items created using this correspondence type.
- Email Settings: Mark or clear the checkboxes under each user role to determine who will receive the email notifications for each Email Event. See Who receives correspondence item emails and push notifications? for more information.
Note: Some email settings are configured on the Company level and affect all projects. For example, the checkbox 'Send Email Reminders for Overdue Items' is described in Create a New Correspondence Type.Important
If a custom Correspondence self-serve workflow is used on a project, correspondence item email notifications for that project are managed through the workflow configuration settings instead. See (Beta) When are email notifications sent for Self-Serve Custom Workflows? for more information
- Default Distribution: Select one or more users or distribution groups from the drop-down menu. Click the
- Click Update to save your changes.
Permissions Table
- Navigate to the project's Correspondence tool.
- Click the Configure Settings icon and select the correspondence type you want to view user permissions for.
- Click Permissions Table in the sidebar.
The User Permissions table displays for the correspondence type.- The green checkmark
 icon indicates the permission level the user has been granted on the correspondence type: 'None', 'Read Only', 'Standard', or 'Admin'.
 - The red
 icon indicates which permission levels are not assigned to the user.
 - The gray
 icon indicates which permission levels are not assigned to the user and cannot currently be changed since the user has been assigned a project permissions template. To change their permissions in the Project level Directory tool, see Change a User's Permissions in the Project Directory.
Tip
See User Permissions Matrix - Web and User Permission Matrix - Mobile for more information about the different actions that can be performed by users with the permission level you select.
- The green checkmark
- To change a user's permission level on the correspondence type when they do not have a project permissions template assigned, click the red icon for the permission level you want to grant to the user.
The red icon is replaced with green checkmark icon and the user's permission level to the correspondence type is automatically saved.