View Lookahead Schedules
View Lookahead Schedules
Objective
To view Lookahead schedules on the project's Schedule tool.
Things to Consider
- Required User Permissions:
- Read-only and above permissions on the project's Schedule tool.
- Additional Information:
- Schedule tasks are defined in an integrated project schedule (e.g. MS Project, Primavera P6, etc.).
Steps
- Navigate to the project's Schedule tool.
- Click the Lookaheads tab.
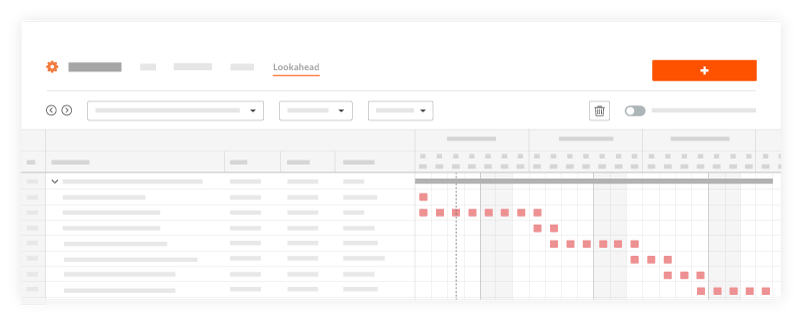
You will see a lookahead showing the date range you selected. A Lookahead can be created to range from one to six weeks. See View Lookahead Schedules.
The following colors and symbols can be seen on a lookahead:

- Blue: Non-Critical
- Red: Critical
- Grey Hatch Pattern: Baselines compare to master schedule
- Hazard Symbol: Date differs from the master schedule
- Configure Columns: Allows you to filter what columns are shown on the Lookahead.
- Filter Options: Allows you to filter what you want to see on the Lookahead. If you only want to see critical paths from a certain date range use the filter options to adjust the Lookahead.
- Compare to Latest Master: Compares Lookaheads to items on the last master schedule updated in Procore.
- Delete lookahead
 : Click the trash icon to delete lookaheads you've created.
The following options are available when viewing a lookahead:
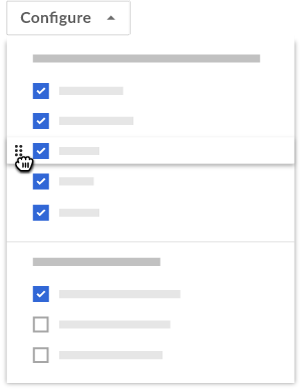
Configure Columns
- Click the Configure drop-down menu.
- Choose which columns you want included on the Lookahead:
- Mark the checkbox next to each option you want to see as a column.
- Clear the checkboxes next to any options you want to hide.
- Selected columns can be sorted on the Lookahead from low to high and high to low.
- Reorder columns on the lookahead chart:
- Hover to the left of the column name you want to move.
- Click and drag the grip
 icon to drop the column name into a new order.
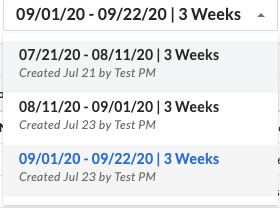
View Other Lookahead Schedules
- Click the date range drop-down to see all the lookaheads created.
Filter Options
- Click Add Filter.
- Choose from the following options to filter by:
- Resources: People resources needed to complete or perform the task.
- Critical Tasks: Shows tasks marked as critical on the native schedule file.
- Company: Companies involved in execution of the task.
- Assignees: Individuals or groups the task is assigned to.
Compare to Latest Master
- Click the toggle ON
 next to 'Compare Lookahead to the Master' if you want to compare.
Note: A Lookahead will always compare to the latest master schedule uploaded. When turning on the compare to latest master you will see a grey hatch pattern directly under the item comparing the lookahead dates with the latest master dates. If there is a delta, a hazard icon will appear next to the schedule task in the lookahead.
See Also
If you would like to learn more about Procore's scheduling software and how it can help your business, please visit our construction scheduling software product page  .
.