Edit a Timesheet
Edit a Timesheet
Objective
To edit the timecard entries on a timesheet using the project's Timesheets tool.
Background
Depending on your user account's permissions level, you will either be limited to editing a timesheet that you created or you can edit any timesheet on the project.
Things to Consider
- Required User Permissions
- When you edit a signed timesheet, Procore removes the signature. The employee must sign it again. See Sign a Timesheet (Android) and Sign a Timesheet (iOS).
- Zero (0) hour entries are supported. This provides your team with the flexibility it needs to enter time off and per diem.
- Depending on your permissions, you may need to change the status of the timesheet to edit the timesheet.
- 'Approved' timecard entries:
- Can only be edited by a user with 'Admin' permissions on the Company level Timesheets tool.
- Cannot be deleted.
- Can only be marked as 'Completed' in the Company level Timesheets tool.
- 'Completed' timecard entries:
- Cannot be edited at the project level. See Edit a Time Entry in the Company Level Timesheets Tool and Edit Your Company's Timesheets in Bulk.
Steps
- Navigate to the project's Timesheets tool.
- Click the Calendar icon to select the Single Day or Date Range.
- Choose from these editing options:
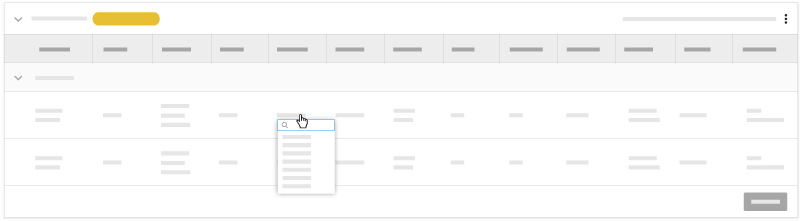
- To edit inline, click a cell in the timecard entry and update the value. Procore automatically saves your update when you click out of a cell.
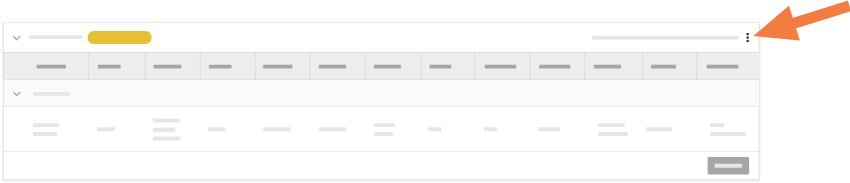
- To bulk edit, click the vertical ellipsis
 icon and choose Edit Timesheet.
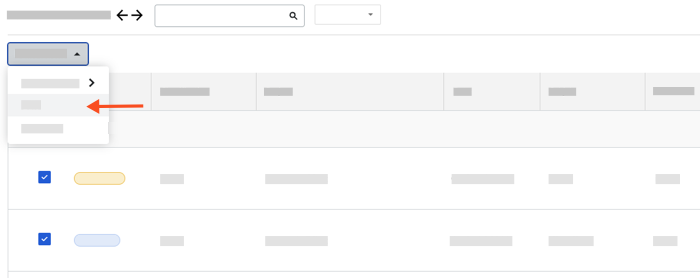
- To bulk edit, mark the checkboxes for the timesheets you want to edit. Click Bulk Actions and Edit.
Note
If your company's Procore Administrator assigns a configurable fieldset to the Project level Timesheets tool, Procore will require you to add the required field data whenever you attempt to edit a timecard entry that is missing data in the required field(s). Reasons a timecard entry might be missing the required field data include:
- The timecard entry was created in the Project level Timesheets tool before the configurable fieldset was assigned to the project.
- The timecard entry was created in the Company level Timecard tool, the Project Level Daily Log tool, or the My Type mobile app. These tools do not enforce the rules that are defined for Project level Timesheets.
- To edit inline, click a cell in the timecard entry and update the value. Procore automatically saves your update when you click out of a cell.
- Edit the information.
- Click Update.
If you would like to learn more about Procore's timesheet management software and how it can help your business, please visit our construction timesheet software product page  .
.