Create a Tender Form in Portfolio Financials
Objective
To create a tender form for a Tender Room in Portfolio Financials.
Background
The Tender Room in Portfolio Financials is a shared portal between the owner and tenderers. Before you can send and manage tender, you must set up the Tender Room and its components. The tender form is a collection of fields provided to your tenderers for them to provide pricing and other information as part of their tender.
Things to Consider
- Required User Permissions:
- 'Limited' access to the project or higher.
Note: Users with 'Limited' access must be on the Tender Room Team for the project.
- 'Limited' access to the project or higher.
Prerequisites
- A Bid Room must be created. See Set Up a Bid Room.
- The Trade Setup page must be completed. See Complete the Trade Setup Page for a Bid Room.
Video
Steps
Creating a tender form is a multi-step process as outlined below. Click a link to jump to another section of this tutorial:
- Select a Tender Form Template
- Enter Tender Form Information
- Complete Optional Fields in the Adjustments Section
- Save or Publish the Bid Form
Step 1: Select a Tender Form Template
After the Trade Setup page has been completed, you will be prompted to select a template for your tender form. Any tender forms that you have previously used are shown here.
- From the Tender Form tab of the relevant Tender Room, select a template from the following options:
Note: You can make changes to the template regardless of the one you choose. These changes do not alter the templates themselves.- Choose from previous: Set up a tender form from another project's tender form.
Tip! Use the Search bar to search for previous templates. - Choose from template:
- Create New: A completely new tender form.
- Simple Tender: A template for tender using lump sum pricing.
- Tenant Fitout: A template for tenant fitouts, usually used for hiring a general contractor.
- Preset template: Use a default Procore template or a template specific to your organization.
- Choose from previous: Set up a tender form from another project's tender form.
Step 2: Enter Tender Form Information
- Complete the following components of the bid form:
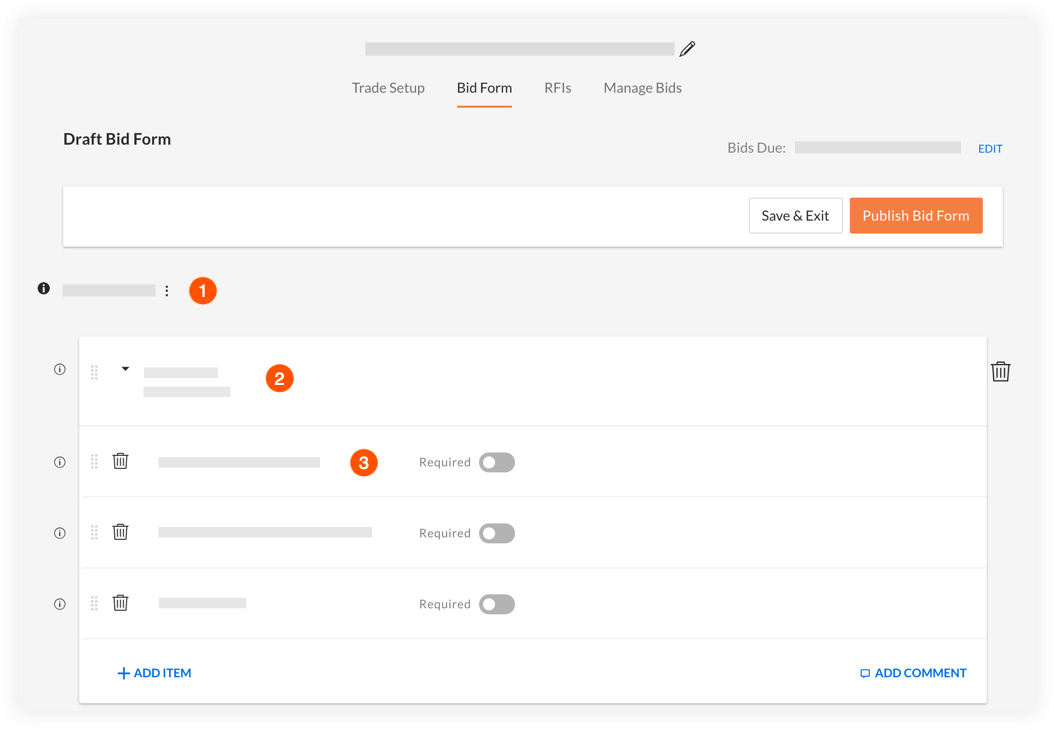
 Sections: A section of your bid form that is comprised of line items. Used to divide up or clarify groups of line items. See Add and Modify Sections below.
 Line Items: Each white box represents a single line item on your bid form for your bidders to submit pricing for. These can be broken down further into sub-line items. See Modify Line Items and Sub-Line Items below.
  Sub-line items: Items within a line item that further break down its pricing. See Modify Line Items and Sub-Line Items below.
Add and Modify Sections
To add, clone, or delete sections:
- Click the vertical ellipsis icon next to a section title.
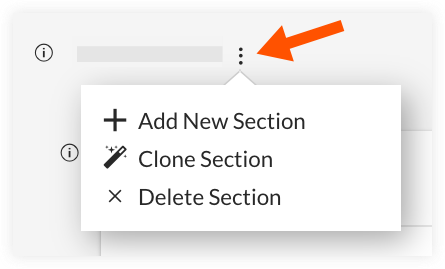
- Click the action you want to perform:
- Add New Section.
- Clone Section.
- Delete Section.
To rename a section:
- Click on the section's name.
- Enter a new name for the section.
- Press ENTER or RETURN on your keyboard.
Modify Line Items and Sub-Line Items
To add a line item to a section:
- Scroll to the bottom of the section you want to add a line item to.
- Click Add Line Item.
- Enter a name for the line item.
- Click Add.
To add a sub-line item to a line item:
- Locate the line item you want to add a sub-line item to.
- Click Add Line Item.
- Enter a name for the sub-line item.
- Click Add.
To rename items:
- Click on the name of the line item or sub-line item.
- Enter a new name.
- Press ENTER or RETURN on your keyboard.
To rearrange items:
- Hover your mouse over the left side of the line item or sub-line item.
- Click and drag the line item to its new location.
To delete items:
- Click the trash can
 icon next to the line item you want to delete.
 - Click Yes to confirm the deletion.
Add or Manage Comments
Note: Comments can be used to provide additional content or information around a specific line item to your tenderers.
To add a comment to a line item:
- Click Add Comment on the item.
- Enter your comment in the box.
- Click Add.
To edit or remove a comment to a line item:
- Click Edit Comment on the item.
- Edit or remove your comment in the box.
- Click Save.
Step 3: Complete Optional Fields in the Adjustments Section
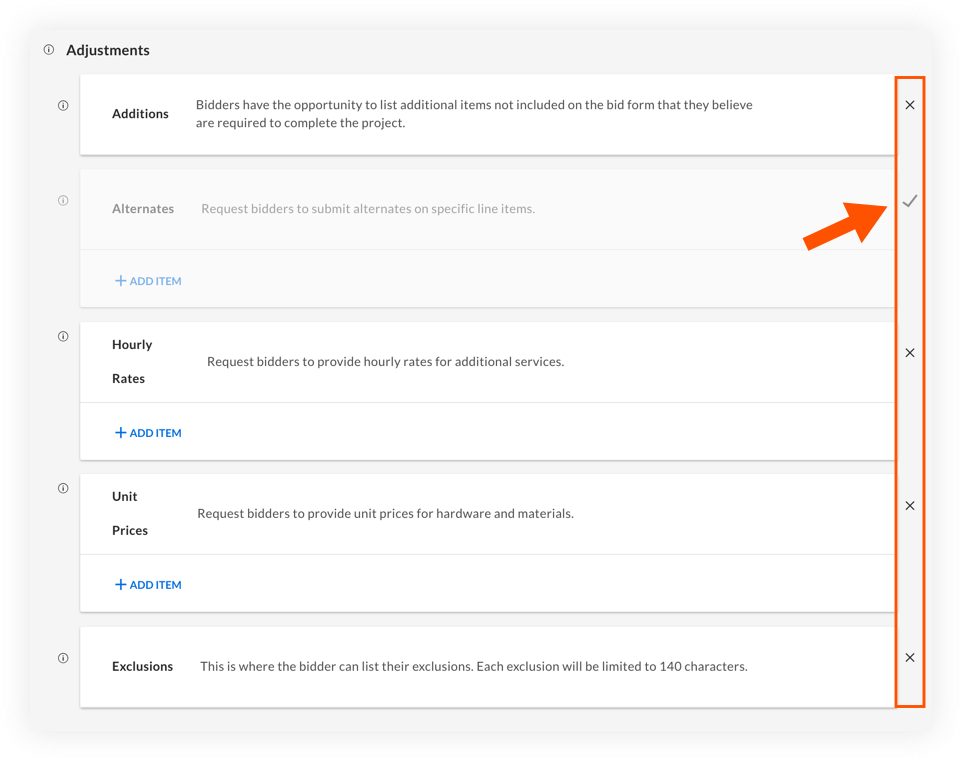
Procore includes additional preset fields on each tender form that can be enabled or disabled. The Adjustments section provides the following additional options for a tender:
- Additions: This provides tenderers with the opportunity to add costs that were not covered by the line items on the tender form.
Note: Additions are included in the total tender amount. - Alternates: If there are alternates specified for the project, you can include them here so that pricing is lined up across the board when tender are submitted. Tenderers can also propose their own alternates.
Note: Alternates are not included in the total tender amount by default, but you will have the option to include them for analysis purposes. - Hourly Rates: List out any hourly rates that you want all tenderers to provide. This section is most often used when tendering out service contracts.
Note: Hourly rates are NOT included in the total tender amount. - Unit Prices: List out any unit prices that you want all tenderers to provide.
Note: Unit prices are not included in the total tender amount. - Exclusions: This provides tenderers with an area to list out exclusions. They can add as many as they need, but each exclusion is limited to 140 characters.
Enable or Disable a Section
- To disable a section, click the X icon for that section.
Note: The field will immediately show as unavailable and the X will be replaced with a checkmark. - To enable a section that was previously disabled, click the checkmark icon for that section.
Note: The section will no longer show as unavailable and the checkmark will be replaced with an X.
Step 4: Save or Publish the Tender Form
When you are done setting up your tender form, choose whether to save and exit or publish the form now:
- To save the tender form as a draft that you can revisit later, click Save and Exit.
Note: When a tender form is saved as a draft, invited tenderers will NOT be able to see the form.
OR - To save the tender form and publish it as the current tender form:
Note: Tenderers invited WILL be able to see the form. However, you can still make changes to the tender form after it is published.- Click Publish Tender Form.
- Click Publish Form to confirm you want to publish the tender form.
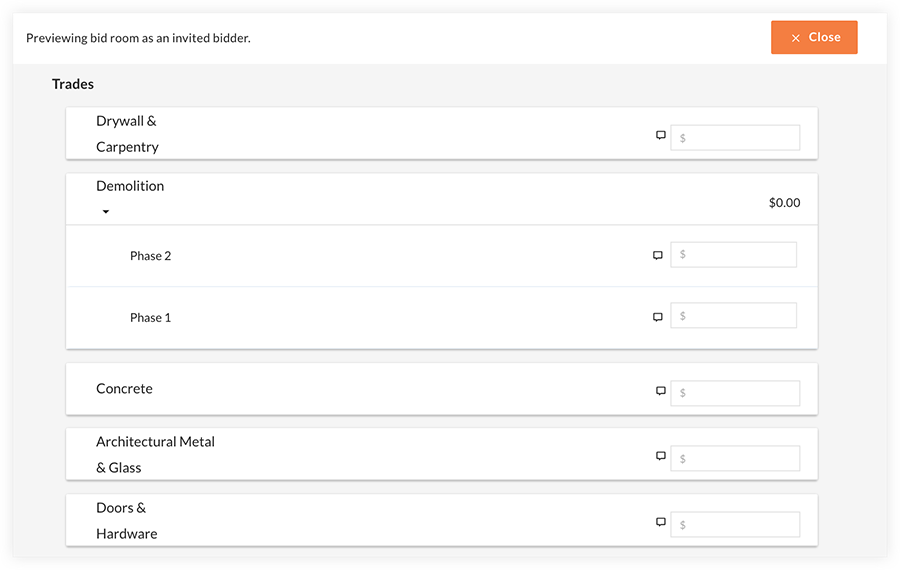
After the tender form is published, line items will be visible to your tenderers as fields that they can enter pricing into (see example below):