Create a Payment Schedule (Legacy)
Procore Internal ONLY
This page details the legacy experience. A updated tutorial for the modernized experience is on this page: https://support.procore.com/products...yment-schedule
Objective
To create a payment schedule for the subcontractor invoice as an invoice administrator.
Background
Construction businesses operating in Australia and New Zealand are creating payment schedules to facilitate the invoice approval process, as well as claims of work performed by downstream collaborators. In a typical payment schedule workflow, downstream collaborators submit invoices for work performed. The upstream collaborator reviews the invoice and approves the amounts on the claim.
Note
 The Payment Schedule feature is designed for Procore users in Australia and New Zealand to satisfy the legal requirement to provide claimants with a payment schedule. However, this feature is available for use by all Invoice Management users.
 A payment schedule is then created for the invoice to show the following information:
- Claimed amounts
- All 'Approved' amounts
- Reasons for 'Rejected' amounts
Things to Consider
- Required User Permissions
- Additional Information:
- To automatically notify an invoice contact by email when an invoice's status changes to 'Approved', see Configure Settings: Commitments.
- To define custom text for the footer on the payment schedule's PDF export file, see Configure Settings: Commitments.
Prerequisites
- Turn the 'Show Amounts Subcontractors Claim' setting ON. See Configure Settings: Invoicing.
- Complete the steps in Create a Subcontractor Invoice.
- For amounts to show on a Payment Schedule, amounts must be entered in the 'Work Completed This Period' and 'Materials Presently Stored' columns on the invoice's Schedule of Values. To learn how to enter these amounts, see:
Steps
- Navigate to the Project level Commitments tool.
- Click the Contracts tab.
- Locate the commitment associated with the invoice that you want to create the payment schedule for.
- Click the commitment's Number link to open it.
- Click the Invoices tab.
- Choose from these options:
- Locate the invoice line item in the table. Then click the PDF
 icon on the right side of the line item.
OR - Locate the invoice line item in the table, then click its View button. Click the Export button and choose PDF from the drop-down menu.
- Locate the invoice line item in the table. Then click the PDF
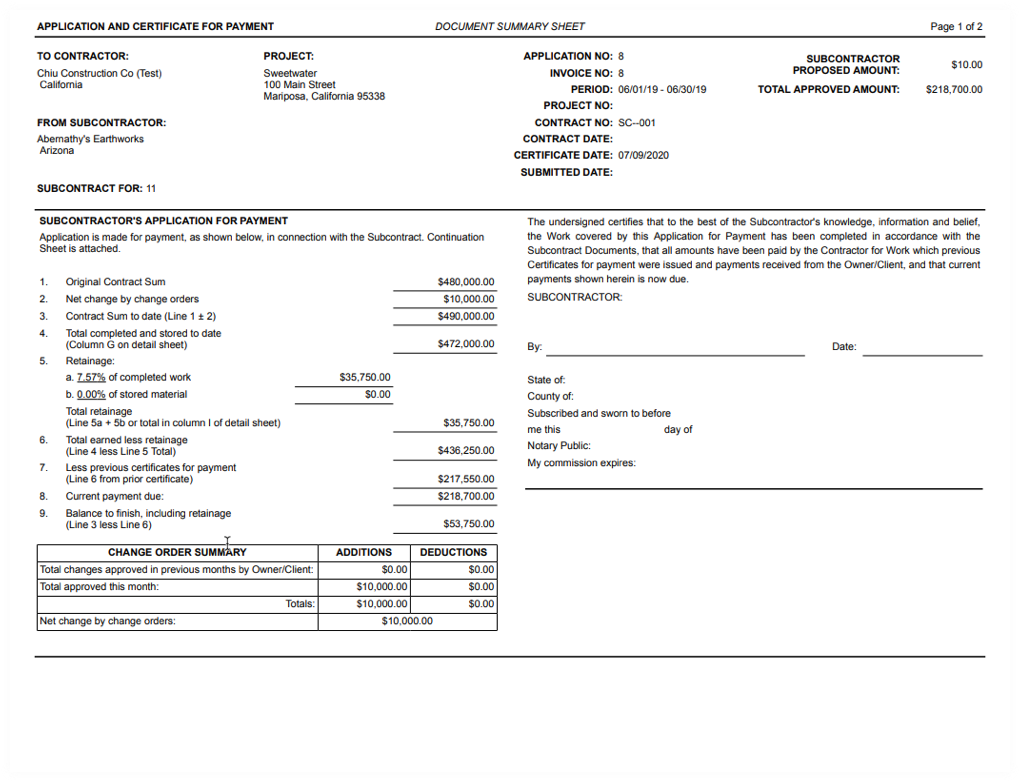
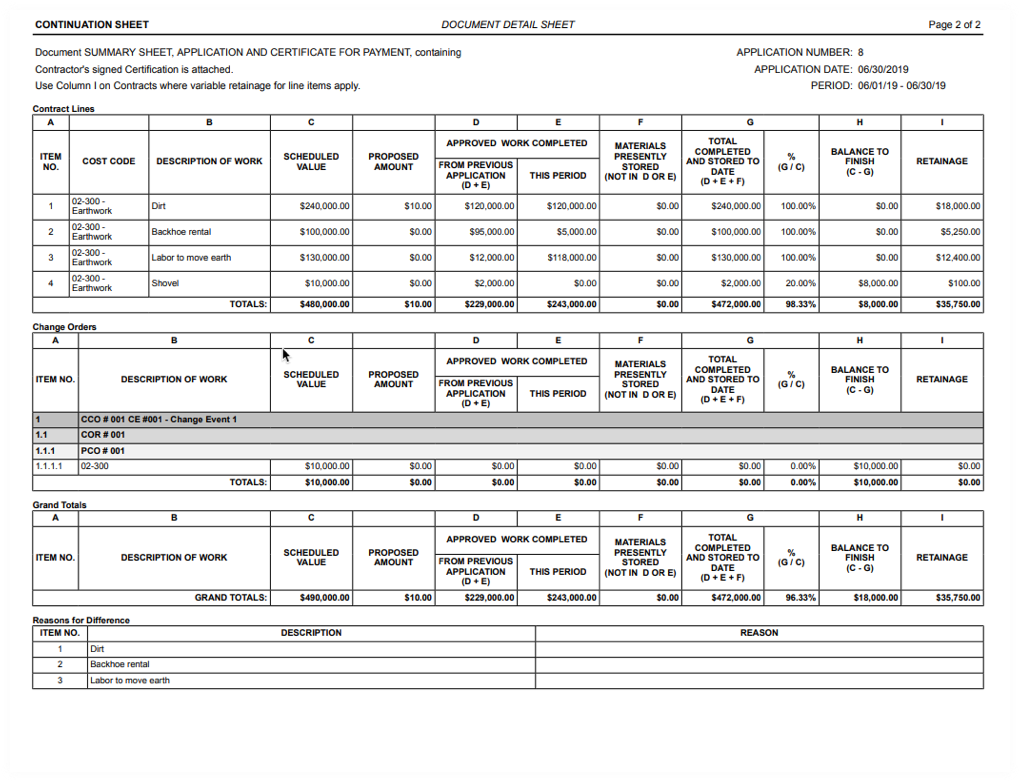
The example below shows you a sample payment schedule.
Example
The illustration below shows you an example of a payment schedule.